Introduction
At DroneView.be, we don’t just deliver drone images, but also actionable data you can work with. Thanks to WebODM, you gain access to interactive 2D and 3D models of your project.
On this page, you’ll find a practical guide on how to make the most of the WebODM 2D and 3D Viewer. Step by step, we explain how to view camera positions, perform measurements, calculate volumes, and analyze terrain. With clear examples and screenshots, you can get started right away.
Tutorial: Using the WebODM 2D Viewer
Working with the 2D view
The 2D view is often the starting point. Here, you get an overview of the entire site in the form of an orthomosaic or elevation map.
Main functions in the 2D view:
- Orthomosaic
- Corrected aerial photo stitched from hundreds of drone images.
- Ideal for creating an accurate map of the entire site.
- You can zoom in to detail level without losing quality.
- Camera Points
- Click on a camera point to see the original photo taken from that location.
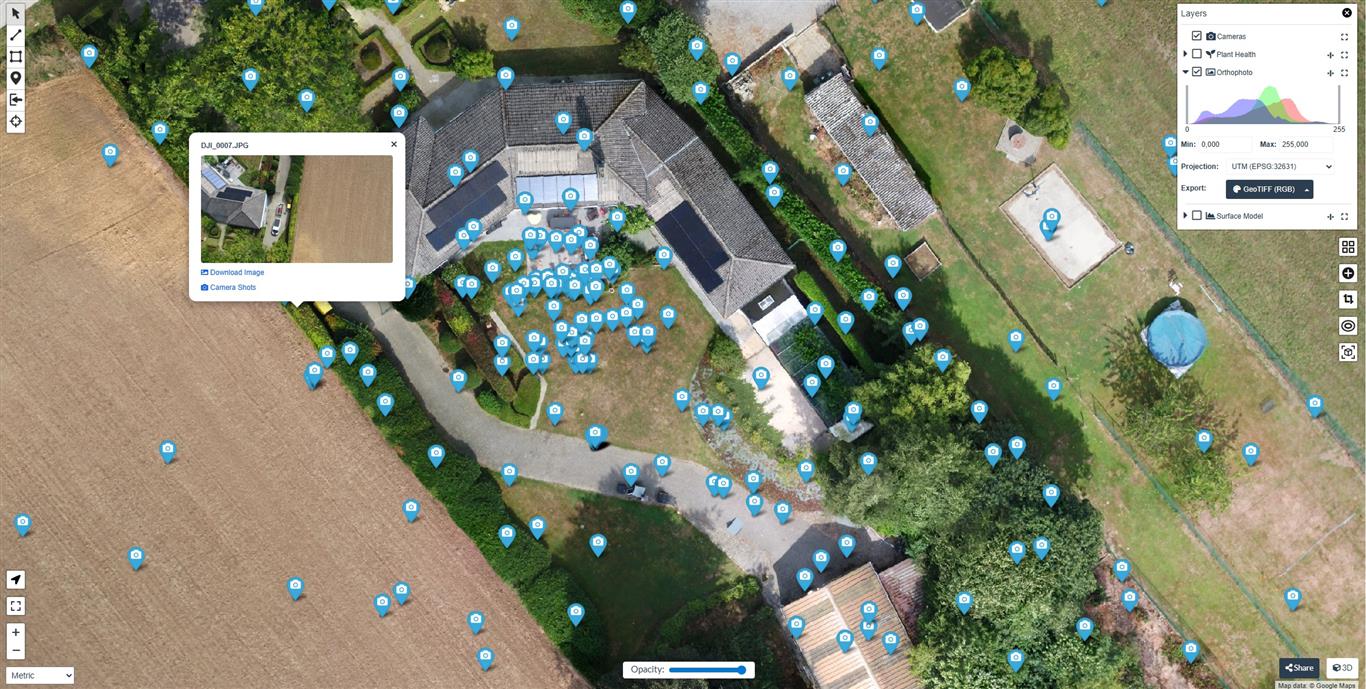
Useful to check a specific detail in the context of the map.
- Basemaps
- Compare your orthomosaic with background maps (e.g. OpenStreetMap or satellite images).
- Clearly see the differences between the situation before and after your project.
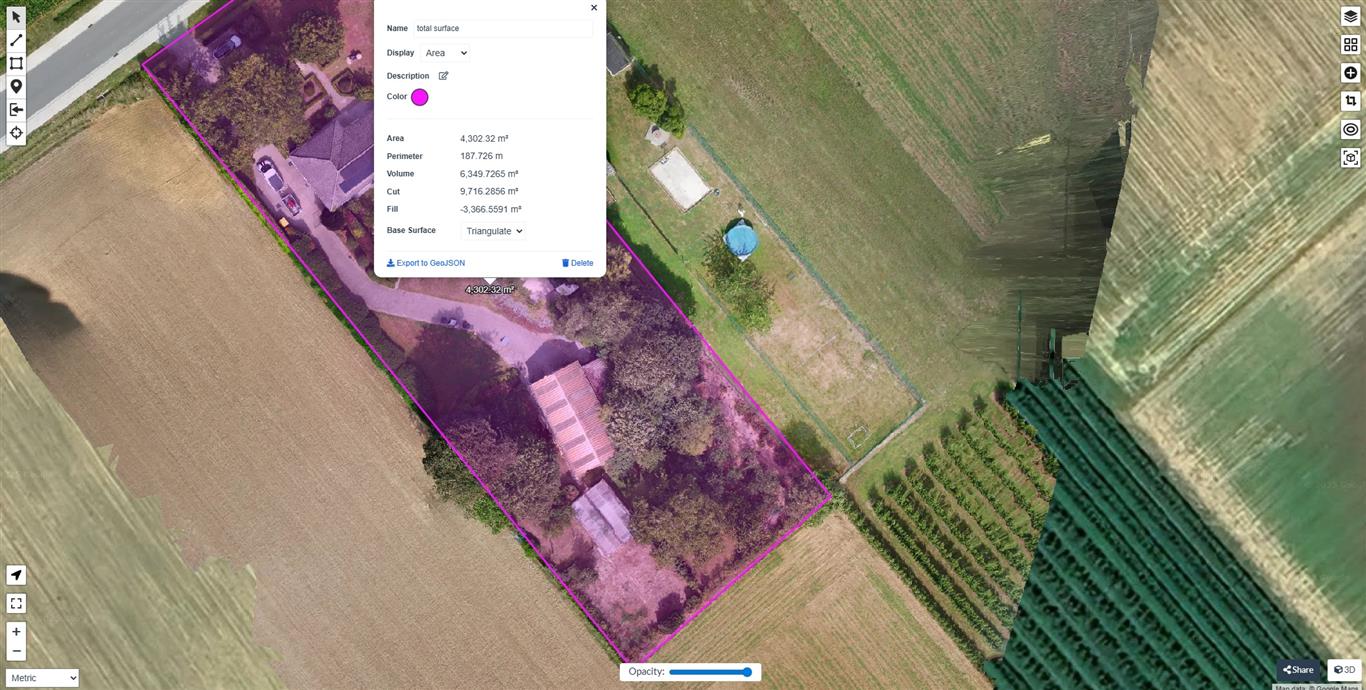
- 2D Measurements
- Draw a line to measure distances.
- Select an area to calculate surface size.
- Place markers to annotate points and share them with colleagues.
Navigation in the 3D Model
You can easily explore the model with your mouse:
- Left mouse button (hold + drag) → rotate around the model (orbit).
- Right mouse button (hold + drag) → move the model (pan).
- Scroll wheel → zoom in and out.
- Double-click → focus the camera on that point.
Additional tools:
- Navigation Cube (top right): click to switch to top, front, or side view.
- Compass: orientation (north/south/east/west).
- Full Extent: return to the full overview.
- Camera Animation: create an automatic fly-through of the model.
(Tip: for large models, it’s useful to zoom out first so you don’t start “inside” the model.)
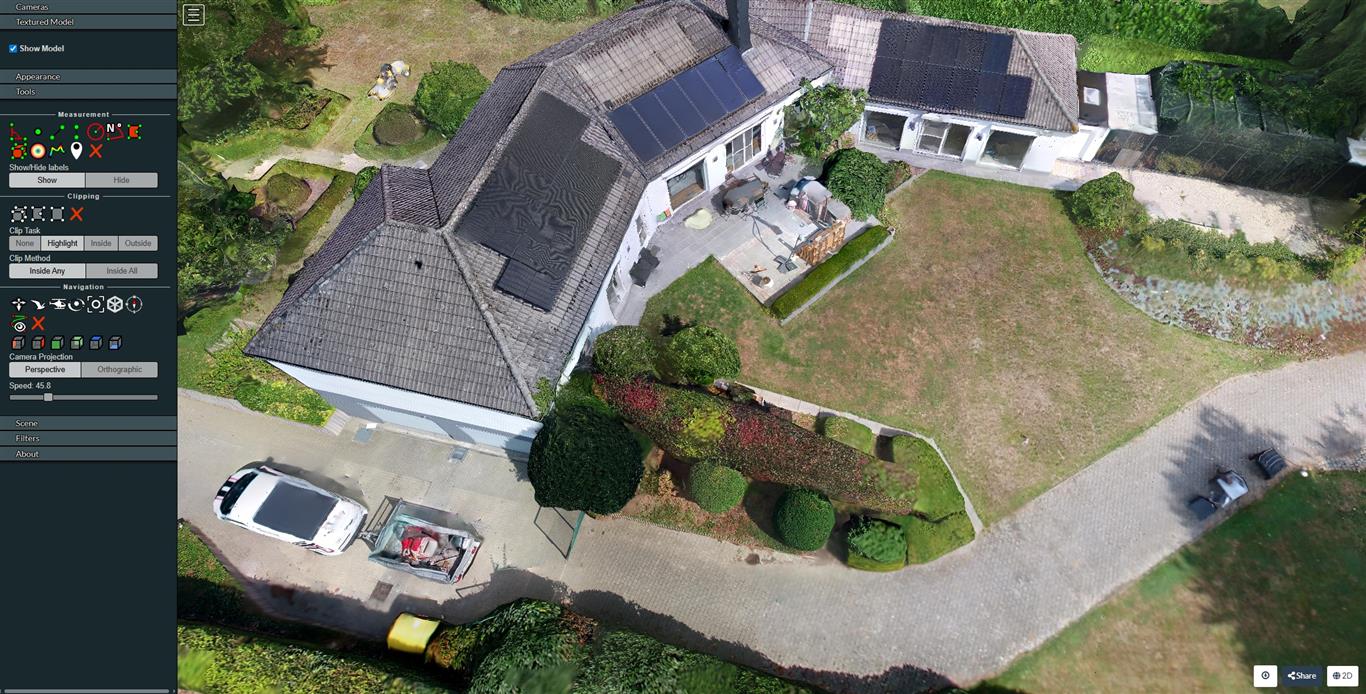
Tutorial – Using the WebODM 3D Viewer
1. Show Camera Positions
- Show Cameras: displays all the positions from which the drone took photos.
Click on a camera point to view the original photo taken at that location.
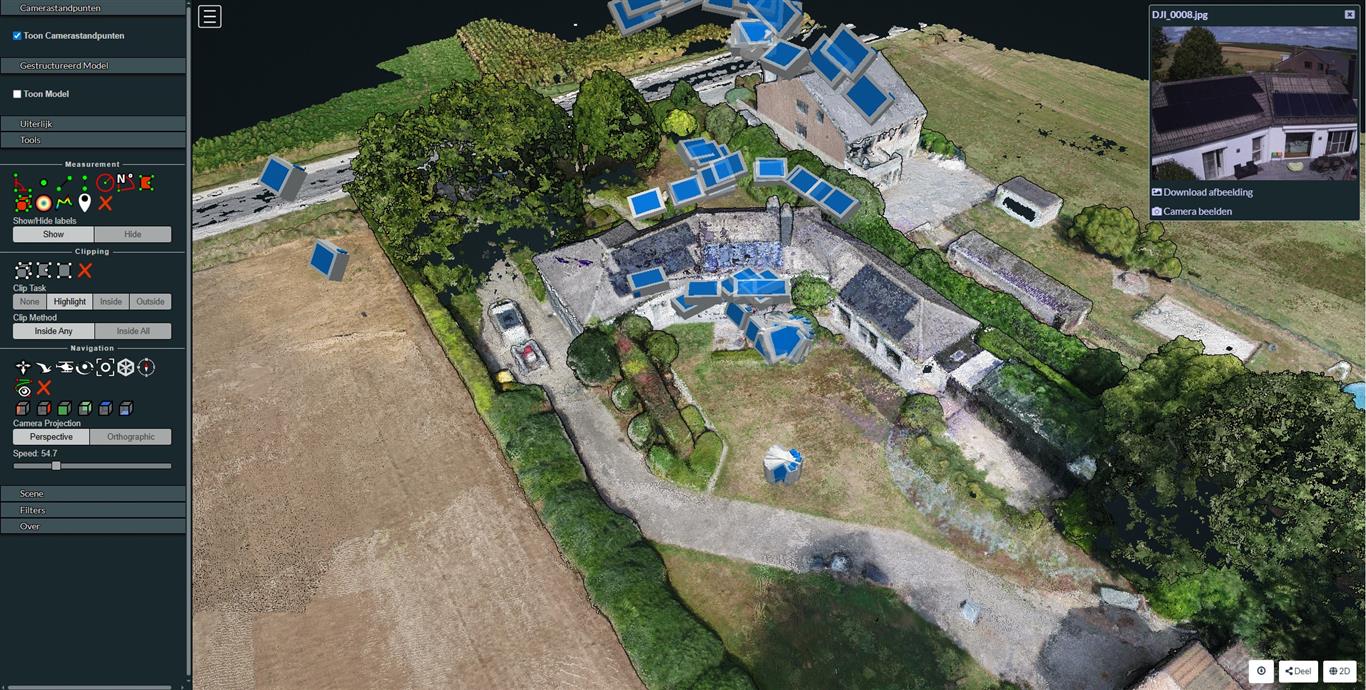
(Useful for analyzing the site using the original images.)
2. Viewing the Model
- Textured Model: View the 3D model with the original drone photos in high resolution. This gives a realistic representation of the site, as if you were hovering above it.Note: For very large projects (more than ±500 photos), loading the Textured Model in the browser may be slow or even fail, depending on the internet connection, RAM, and browser. For smaller projects (e.g. ±300 photos), this usually works smoothly.
- Appearance: adjust the number of visible points. Fewer points = faster loading, more points = more detail.
- Eye-Dome-Lighting: adjust contrast and shadows to make height differences more visible.
3. Performing Measurements
The viewer includes several measurement tools you can apply directly to the model:
- Point measurement → coordinates of a point.
- Distance → calculate the distance between two points.
- Height → difference in elevation between two points.
- Area → calculate the size of a selected surface.
- Volume → calculate the volume of a selected area or pile.
- Height profile → cross-section of the terrain along a line.
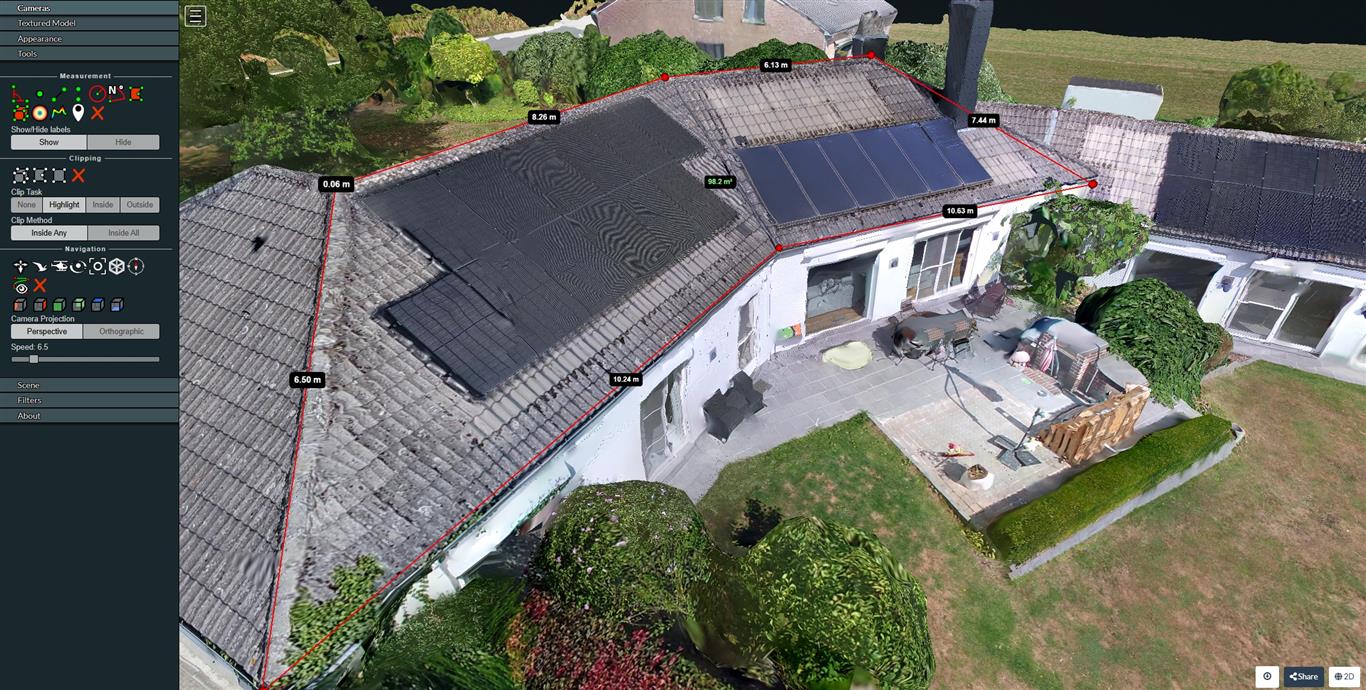
(With these functions you can perform your own volume calculations and terrain measurements.)
4. Annotations and Labels
With the Annotations feature, you can add notes or mark areas in the model. You can find this option under Tools → Measurements (button Annotation) or in the column Objects → Annotations.
This is useful for recording or sharing information with colleagues and partners. For example, you can mark an area as “to be inspected” or “completed.”
5. Clipping and Selection
- Select a specific part of the model.
- Ideal for isolating a pile or zone and analyzing it separately.
6. Navigation and Display
- Use the Navigation Cube or the Compass to rotate the model.
- Choose different navigation modes: orbit (free view), fly, helicopter.
- Full Extent: return to the full overview.
- Camera Animation: create an automatic fly-through of the model.
7. Export
- Export measurements, labels, or other data.
- Choose your units (meter, foot, inch).
Tips for Optimal Performance
- Ensure a stable and fast internet connection.
- Use a modern browser such as Chrome or Firefox.
- For large projects, sufficient RAM is recommended to smoothly load the 3D model.
- Start with less detail (appearance), and increase the number of points if needed.
Delivery of Your Project
At DroneView.be, you decide how you want to receive your data:
- Cloud version via WebODM Cloud: directly accessible in your browser, no extra software needed (€99/month or €999/year).
- ZIP file: all project files locally available on your own computer, completely independent of the cloud.
With the WebODM 2D and 3D Viewer, you have powerful tools to analyze your site. From simple measurements to detailed volume calculations, you always have an up-to-date overview of your project.
With the 2D and 3D viewer of WebODM, you have powerful tools to analyze your site. From simple measurements to detailed volume calculations, you always have an up-to-date overview of your project.
Interactive 3D model in action
With WebODM, we can transform drone images into realistic 3D models. Below is an example of a house we fully captured. The model can be freely explored and rotated, as if you were flying around it yourself.
Thanks to this technology, clients get a clear and measurable overview of their project – ideal for inspections, renovation planning, or visualization.
Do you have any questions or would you like guidance on how to use the viewer?